01 — The Problem
The dilemma
Blender
Full control over your image
- Precise composition and perspective
- Exact lighting and camera parameters
- Accurate depth of field placement
- Fully reproducible results
- Time-consuming material and texture work
- Atmospheric details require extensive effort
AI Image Generation
Photorealistic output
- Rich materials and textures instantly
- Atmospheric depth and imperfections
- Photographic quality in seconds
- Composition is hard to control precisely
- Repeatability is nearly impossible
- No control over geometry or perspective
RAY-L
RAY-L splits the work along the line where each side is strong. Blender decides what sits where – geometry, perspective, camera, composition – and hands it over as an edge map. The model generates materials, textures, light and atmosphere from your prompt, inside that structure. The result is neither pure rendering nor pure AI image, but a controlled image that neither technology could produce alone.
02 — Before / After
Same geometry. Different world.


What the combination of Blender and AI image generation is capable of. The Blender scene works with deliberately minimal geometry – a few simple volumes, flat grey, no textures, no detailed materials. Blender fixes what a photographer would fix on set: perspective, camera position, framing. Everything else – surfaces, landscape, weather, light and mood – is worked out in the prompt. Drag the slider to compare.
03 — How it works
Four steps, one tool.
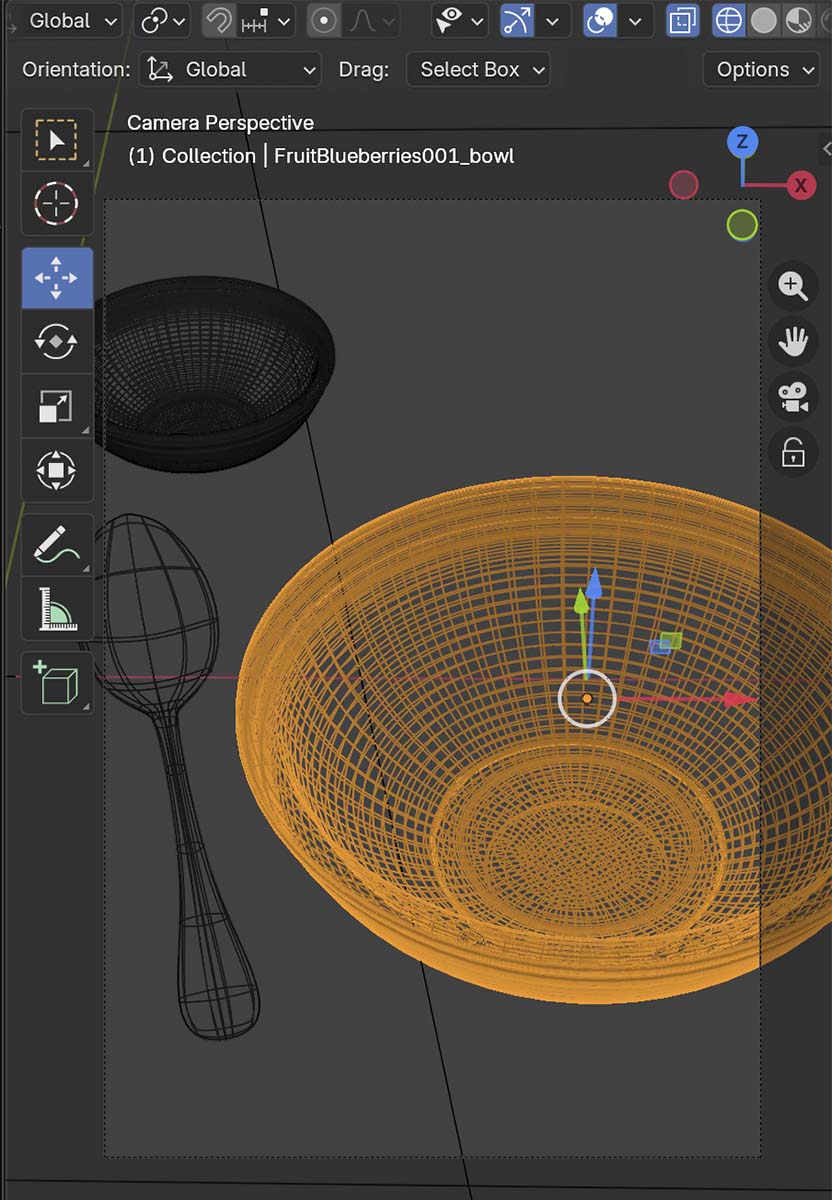
01
Build your scene in Blender
Geometry, perspective, camera, composition – full 3D control as usual. Light the scene so the important edges stand out: in Blender, lighting shapes the edge map, not the mood of the final image.
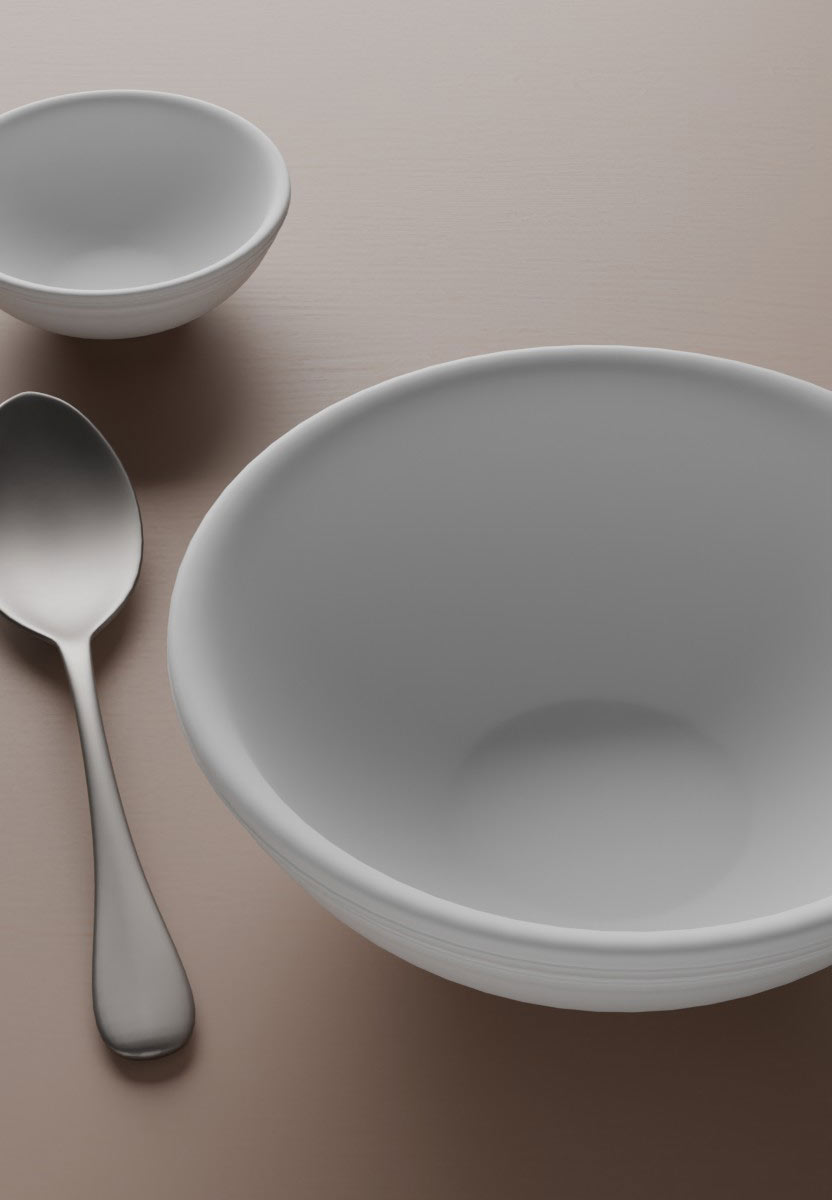
02
Render and save as reference
Press F12 with Cycles or EEVEE, then save the render as reference with one click in the RAY-L panel.

03
Send to ComfyUI
ComfyUI – running locally – computes the Canny edge map and passes it to ControlNet, together with your prompt and the model you picked: SDXL, Flux.1 dev or Flux.1 Krea dev.
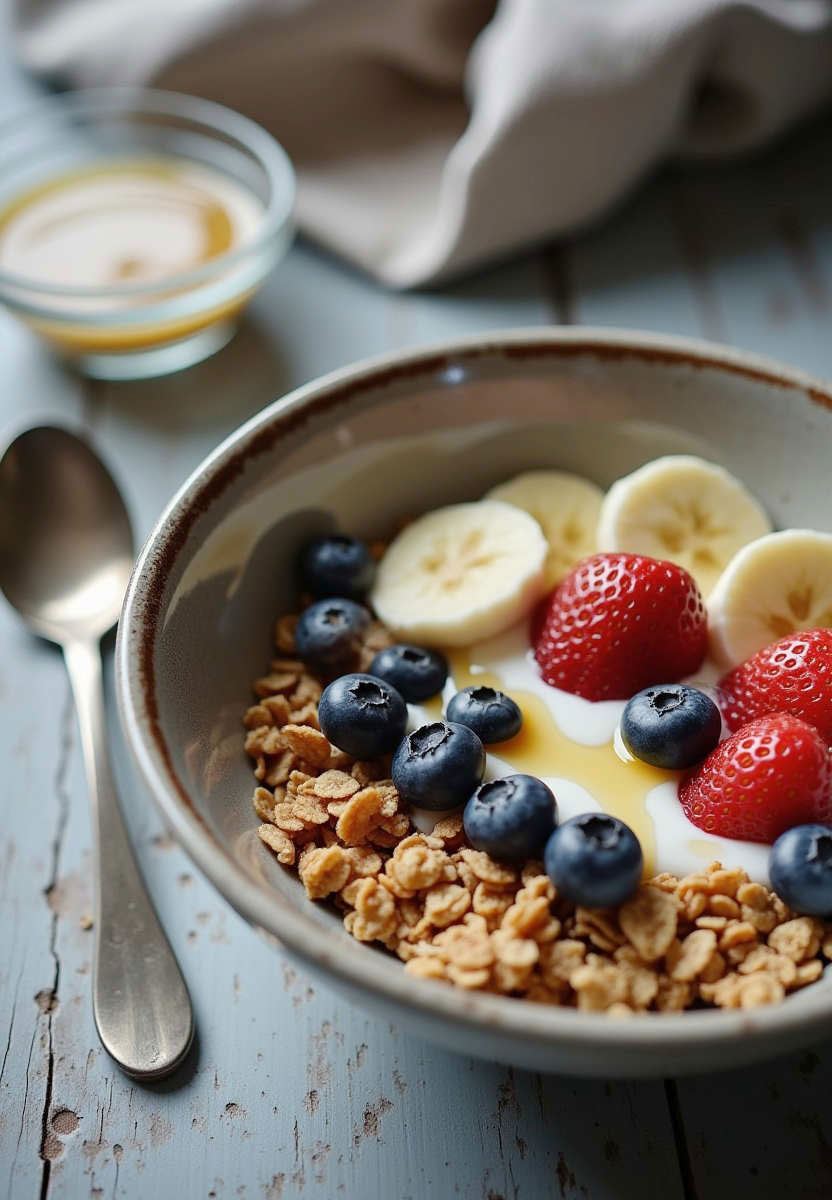
04
Result back in Blender
The image lands in the Blender Image Editor, next to a Canny preview that shows exactly which edges ControlNet received.
The key technology
ControlNet Canny passes the edge structure of your 3D scene to the model. Geometry, perspective and composition stay exactly as defined in Blender; materials, light and atmosphere come from the prompt. Edge detection runs inside ComfyUI – nothing to install into Blender's Python, no conflicts with other add-ons.
And back again
Every image RAY-L generates is stored in ComfyUI as a PNG with its workflow embedded. Open it there, extend it – an upscaler, an img2img stage with a reference image, whatever nodes you need – save it as API JSON and load it into RAY-L as an external workflow. From then on, your added nodes run every time you generate from Blender.
04 — Features
What RAY-L does.
Local · Free · Open
No cloud. No fees.
Runs entirely on your machine. Blender and ComfyUI are open source, the models run locally as open weights. No subscription, no per-render costs, no data leaving your system.
ControlNet Canny
Geometry stays yours.
ControlNet Canny preserves the edge structure of your 3D scene. The model generates materials, light and atmosphere – your composition stays untouched.
Photographer's perspective
Built like a camera.
Designed by a photographer with 30+ years of experience. Every workflow decision reflects photographic thinking – not generic pipeline logic.
Model-agnostic · Both directions
Not tied to one model.
SDXL, Flux.1 dev and Flux.1 Krea dev out of the box – model files, text encoders (T5, CLIP-L) and VAE are set directly in the panel. Or bring your own ComfyUI workflow as API JSON, extensions included.
Blender 5.0+ · macOS & Windows
Cross-platform, natively.
Runs on macOS Apple Silicon and Windows with an NVIDIA GPU, on any Blender from 5.0 up. Installs from a single ZIP — no OpenCV, no touching Blender's Python, nothing to compile. Tested on MacBook Air 16 GB, MacBook Pro 64 GB, and a Windows RTX 2070 8 GB — the low end of the target range, so newer NVIDIA cards have more headroom, not less.
Tutorials included
Understand what you do.
Full setup guides, workflow tutorials and concept explanations at 3dwrkshp.com – free. Because understanding the tool matters more than using it.
05 — Roadmap
Where RAY-L is going.
v0.9 · Now
Beta
A model-agnostic bridge, both directions
- Full Blender → ComfyUI → result pipeline working
- ControlNet Canny – handled entirely by ComfyUI
- No OpenCV, no touching Blender's Python – installs from a single ZIP
- Blender 5.0+ / macOS Apple Silicon & Windows (NVIDIA)
- SDXL, Flux.1 dev and Flux.1 Krea dev in one panel
- Model files, text encoders (T5, CLIP-L) and VAE set directly in the panel
- Workflows extended in ComfyUI load back as external workflow JSON – tested on macOS and Windows
v1.x · Next
More control signals
- Depth Pass as ControlNet input
- Multiple ControlNet inputs simultaneously
- Restructured panel (Quick / Workflow / Advanced)
- Qwen-Image – in testing
Later
Full pipeline
- Normal Pass integration
- Mask-based inpainting – targeted AI editing
06 — About
“At the end of the day, everything comes down to light.”
RAY-L was not built by a programmer who uses photography as a reference. It was built by a photographer with over 30 years of experience in light, image composition and photorealistic 3D visualization.
That background shapes every decision inside the tool – from the workflow logic to the ControlNet configuration. RAY-L is not designed to generate images. It is designed to make them.
The tutorials at 3dwrkshp.com explain the thinking behind the tool – free, in depth, and permanently.
Matthias Demand
Photographer · CGI Artist · Educator · Lich, Germany